nginx build
목차
초간단 nginx 빌드 방법
nginx 내부 소스를 조금 수정하여 빌드해야 할 일이 생겨 기록하게 되었다.
소스 다운로드
링크 : http://nginx.org/en/download.html
아래 링크에서 알맞는 버전의 소스를 다운로드 할 수 있도록 하자.
또는 링크를 수정하여 다운로드 할 수 있다.
1

wget --no-check-certificate http://nginx.org/download/nginx-1.18.0.tar.gz
필자는 nginx -v 를 쳤을 때 기존에 apt로 설치된 nginx의 버전이 1.18.0 버전이었던 관계로 1.18 버전으로 진행하였다.
1
2

# nginx -v
nginx version: nginx/1.18.0 (Ubuntu)
./configure 작성
빌드 환경
1
2
3
4
5

No LSB modules are available.
Distributor ID: Ubuntu
Description:    Ubuntu 20.04.5 LTS
Release:        20.04
Codename:       focal
압축파일을 풀어 configure 옵션을 지정한다.
옵션이 많을 수 있으니 따로 배쉬 스크립트 파일 등을 만들어 진행하는 게 좋을 것이다.
build 옵션 문서 : http://nginx.org/en/docs/configure.html
만약 openssl 버전을 지정해야 한다면 문서를 참조하자.
1
2
3
4
5

# nginx -V
nginx version: nginx/1.18.0 (Ubuntu)
built with OpenSSL 1.1.1f  31 Mar 2020
TLS SNI support enabled
configure arguments: --with-cc-opt='-g -O2 -fdebug-prefix-map=/build/nginx-lUTckl/nginx-1.18.0=. -fstack-protector-strong -Wformat -Werror=format-security -fPIC -Wdate-time -D_FORTIFY_SOURCE=2' --with-ld-opt='-Wl,-Bsymbolic-functions -Wl,-z,relro -Wl,-z,now -fPIC' --prefix=/usr/share/nginx --conf-path=/etc/nginx/nginx.conf --http-log-path=/var/log/nginx/access.log --error-log-path=/var/log/nginx/error.log --lock-path=/var/lock/nginx.lock --pid-path=/run/nginx.pid --modules-path=/usr/lib/nginx/modules --http-client-body-temp-path=/var/lib/nginx/body --http-fastcgi-temp-path=/var/lib/nginx/fastcgi --http-proxy-temp-path=/var/lib/nginx/proxy --http-scgi-temp-path=/var/lib/nginx/scgi --http-uwsgi-temp-path=/var/lib/nginx/uwsgi --with-debug --with-compat --with-pcre-jit --with-http_ssl_module --with-http_stub_status_module --with-http_realip_module --with-http_auth_request_module --with-http_v2_module --with-http_dav_module --with-http_slice_module --with-threads --with-http_addition_module --with-http_gunzip_module --with-http_gzip_static_module --with-http_image_filter_module=dynamic --with-http_sub_module --with-http_xslt_module=dynamic --with-stream=dynamic --with-stream_ssl_module --with-mail=dynamic --with-mail_ssl_module
필자는 기존에 설치된 nginx의 컴파일 옵션을 그대로 줘서 진행했다.
build.sh 파일을 만들고 실행권한을 준 뒤 옵션을 기입하고 알맞게 수정한다.
``–with-cc-opt` 에서 원래 -O2 (Optimizer 컴파일 최적화 옵션 2단계) 진행되었으나
필자의 경우 디버깅을 위해 -O0 (컴파일 최적화 옵션 사용 안함) 으로 수정하였다.
이외 아래 내용과 같이 특정 라이브러리가 설치되지 않았다는 오류가 있어 설치하여 해결하였다.
1
2
3
4
5
6
7
8
9
10

./configure: error: the HTTP rewrite module requires the PCRE library.
You can either disable the module by using --without-http_rewrite_module
option, or install the PCRE library into the system, or build the PCRE library
statically from the source with nginx by using --with-pcre=<path> option.

./configure: error: the HTTP XSLT module requires the libxml2/libxslt
libraries. You can either do not enable the module or install the libraries.

./configure: error: the HTTP image filter module requires the GD library.
You can either do not enable the module or install the libraries.
1
2
3
4
5
6
7
8

# pcre
apt-get -y install libpcre libpcre-dev
# libxml
apt-get -y install libxml2 libxml2-dev
# libxslt
apt-get -y install libxslt1.1 libxslt1-dev
# libgd
apt-get -y install libgd-dev
라이브러리는 아마 대체로 /usr/lib/x86-64-linux-gnu 에 있을 것이다. 이외에는 find 명령어로 직접 찾아보기 바란다.
최종적으로 작성한 build.sh 는 다음과 같다.
1
2
3
4
5
6
7
8
9
10
11
12
13
14
15
16
17
18
19
20
21
22
23
24
25
26
27
28
29
30
31
32
33
34
35
36
37
38
39
40
41
42

#!/bin/bash

# --with-pcre=/usr/lib/x86_64-linux-gnu/libpcre.so \
# --prefix=/etc/nginx \
./configure \
    --with-cc-opt='-g -O0 -fdebug-prefix-map=/build/nginx-lUTckl/nginx-1.18.0=. -fstack-protector-strong -Wformat -Werror=format-security -fPIC -Wdate-time -D_FORTIFY_SOURCE=2' \
    --with-ld-opt='-Wl,-Bsymbolic-functions -Wl,-z,relro -Wl,-z,now -fPIC' \
    --sbin-path=/usr/sbin/nginx \
    --prefix=/usr/share/nginx \
    --conf-path=/etc/nginx/nginx.conf \
    --http-log-path=/var/log/nginx/access.log \
    --error-log-path=/var/log/nginx/error.log \
    --lock-path=/var/lock/nginx.lock \
    --pid-path=/run/nginx.pid \
    --modules-path=/usr/lib/nginx/modules \
    --http-client-body-temp-path=/var/lib/nginx/body \
    --http-fastcgi-temp-path=/var/lib/nginx/fastcgi \
    --http-proxy-temp-path=/var/lib/nginx/proxy \
    --http-scgi-temp-path=/var/lib/nginx/scgi \
    --http-uwsgi-temp-path=/var/lib/nginx/uwsgi \
    --with-debug \
    --with-compat \
    --with-pcre \
    --with-pcre-jit \
    --with-http_ssl_module \
    --with-http_stub_status_module \
    --with-http_realip_module \
    --with-http_auth_request_module \
    --with-http_v2_module \
    --with-http_dav_module \
    --with-http_slice_module \
    --with-threads \
    --with-http_addition_module \
    --with-http_gunzip_module \
    --with-http_gzip_static_module \
    --with-http_image_filter_module=dynamic \
    --with-http_sub_module \
    --with-http_xslt_module=dynamic \
    --with-stream=dynamic \
    --with-stream_ssl_module \
    --with-mail=dynamic \
    --with-mail_ssl_module
configure 진행이 끝나면 아래와 같은 출력결과를 볼 수 있을 것이다.
1
2
3
4
5
6
7
8
9
10
11
12
13
14
15
16
17
18
19
20
21

creating objs/Makefile

Configuration summary
  + using threads
  + using PCRE library: /usr/lib/x86_64-linux-gnu/libpcre.so
  + using system OpenSSL library
  + using system zlib library

  nginx path prefix: "/usr/share/nginx"
  nginx binary file: "/usr/share/nginx/sbin/nginx"
  nginx modules path: "/usr/lib/nginx/modules"
  nginx configuration prefix: "/etc/nginx"
  nginx configuration file: "/etc/nginx/nginx.conf"
  nginx pid file: "/run/nginx.pid"
  nginx error log file: "/var/log/nginx/error.log"
  nginx http access log file: "/var/log/nginx/access.log"
  nginx http client request body temporary files: "/var/lib/nginx/body"
  nginx http proxy temporary files: "/var/lib/nginx/proxy"
  nginx http fastcgi temporary files: "/var/lib/nginx/fastcgi"
  nginx http uwsgi temporary files: "/var/lib/nginx/uwsgi"
  nginx http scgi temporary files: "/var/lib/nginx/scgi"
Make
컴파일 진행
1

make -j8
성공적으로 진행되었을 시 objs/ 내 파일들이 보일 것이다.
1

make install
명령어를 통해 설치를 진행할 수 있다.
DEBUG
기존 nginx 죽이는 쉘 스크립트 작성
kill_nginx.sh (chmod 755)
1
2
3
4
5
6
7
8
9
10
11
12
13
14
15
16

#!/bin/bash

PROCESS=nginx

while [ : ]; do

pid_result=$(pidof $PROCESS)
if [[ "$pid_result" = "" ]]; then
    echo "$PROCESS is not running"
    break
fi

pkill -f "$PROCESS:"
echo "kill $PROCESS process"

done
start.sh 스크립트 작성 (chmod 755)
1
2
3
4
5
6
7
8
9
10
11

#!/bin/bash

curpath=$(dirname $(realpath $0))
cd $curpath

./kill_nginx.sh

echo "$PROCESS start"
# /usr/sbin/nginx

./objs/nginx
gdb 없으면 설치하고
1

apt-get install gdb
필자는 vscode로 디버깅 진행할 것이기 때문에
launch.json과 tasks.json 등을 맞춰줌
현재 필자의 ${workspaceFolder:nginx} 경로는 ~/nginx/src/ 이기 때문에
~/nginx/objs/ 경로를 맞춰주기 위해 ../ 설정
각자의 세팅에 알맞게 설정 바람
1
2
3
4
5
6
7
8
9
10
11
12
13
14
15
16
17
18
19
20
21
22
23

nginx (project dir)
- auto/
- conf/
- contrib/
...(중략)...
- objs/
    - nginx (execute file)
- src/
    - source
    - .vscode/
        + nginx.code-workspace
            - workspace 내 folder 설정은 다음과 같이 진행함
	            "folders": [
	            	{
	            		"name": "nginx",
	            		"path": "../"
	            	},
	            ],
        + tasks.json
        + launch.json
+ build_nginx.sh
+ kill_nginx.sh
+ start.sh
launch.json
1
2
3
4
5
6
7
8
9
10
11
12
13
14
15
16
17
18
19
20
21
22
23
24
25
26
27
28
29
30
31
32
33
34
35
36
37
38
39
40
41
42
43
44
45
46
47
48
49
50
51
52
53
54
55
56
57
58
59
60
61
62
63
64
65
66
67

{
	"version": "0.2.0",
	"configurations": [
		{
			"name": "nginx",
			"type": "cppdbg",
			"request": "launch",
			"program": "${workspaceFolder:nginx}/../objs/nginx",
			"args": [],
			"stopAtEntry": false,
			"cwd": "${workspaceFolder:nginx}",
			"environment": [],
			"externalConsole": false,
			"MIMode": "gdb",
			"showDisplayString": true,
			"setupCommands": [
				{
					"description": "gdb에 자동 서식 지정 사용",
					"text": "-enable-pretty-printing",
					"ignoreFailures": true
				},
				{
					"description": "SIG34 무시",
					"text": "handle SIG34 nostop noprint pass",
					"ignoreFailures": true
				},
				{
					"description": "SIG33 무시",
					"text": "handle SIG33 nostop noprint pass",
					"ignoreFailures": true
				},
				{
					"description": "문자열 1000자 이상은 자르기",
					"text": "set print elements 1000",
					"ignoreFailures": true
				},
				{
					"description": "어셈블리 코드 인텔 스타일 사용",
					"text": "set disassembly-flavor intel",
					"ignoreFailures": true
				},
				{
					"description": "자식 프로세스 디버깅 (worker process debuging)",
					"text": "set follow-fork-mode child",
					"ignoreFailures": true,
				},
			],
			// breakpoint 중첩되는것 제거
			"sourceFileMap": {
				"${workspaceFolder}": {
					"editorPath": "${workspaceFolder:nginx}",
					"useForBreakpoints": "true"
				},
			},
			"preLaunchTask": "nginx kill",
			// gdb 통신 로그 확인
			// "logging": {
			// 	"engineLogging": false,
			// 	"exceptions": false,
			// 	"moduleLoad": false,
			// 	"programOutput": true,
			// 	"trace": false,
			// 	"traceResponse": false,
			// },
		},
	],
}
tasks.json
1
2
3
4
5
6
7
8
9
10
11
12
13
14
15
16
17
18
19
20
21

{
	"version": "2.0.0",
	"tasks": [
		{
			"type": "shell",
			"label": "nginx kill",
			"command": "${workspaceFolder:nginx}/../kill_nginx.sh",
			"args": [ ],
			"options": {
				// "cwd": "${workspaceFolder:nginx}/../"
			},
			"problemMatcher": [
				"$gcc"
			],
			"presentation": {
				"revealProblems": "onProblem",
				"close": true
			}
		}
	]
}
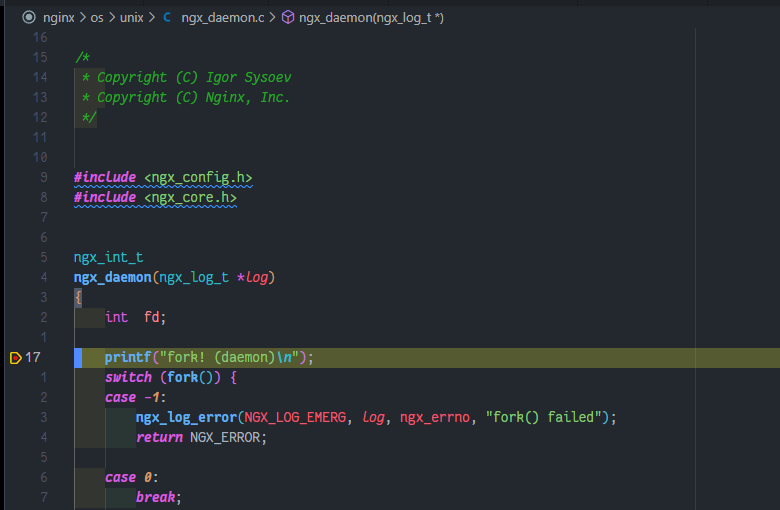
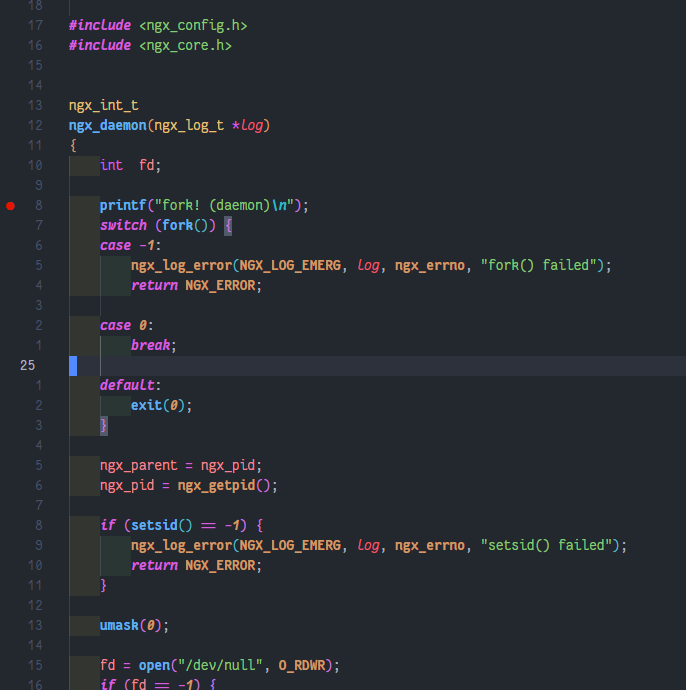
ngx_daemon.c 파일에 printf 문 하나 만들어준 뒤 중단점 찍고 디버깅 해봄
정상적으로 breakpoint 걸림
그런데 왜 헤더를 못찾냐
./ngx_auto_config.h ./ngx_auto_headers.h 는 objs/ 디렉토리에 있어서 그렇군..
c_cpp_properties.json 를 다음과 같이 수정했다.
1
2
3
4
5
6
7
8
9
10
11
12
13
14
15
16
17
18
19

{
    "configurations": [
        {
            "name": "Linux",
            "includePath": [
                "${workspaceFolder:nginx}/**",
                "${workspaceFolder:nginx}/../objs/*",
                "/usr/include/**"
            ],
            "defines": [],
            "compilerPath": "/usr/bin/gcc",
            "cStandard": "gnu11",
            "cppStandard": "gnu++14",
            "intelliSenseMode": "linux-gcc-x64",
            "configurationProvider": "ms-vscode.cmake-tools"
        }
    ],
    "version": 4
}
worker process 디버깅을 진행하고 싶으면 set follow-fork-mode child 옵션을 주고
(필자가 적은 launch.json 에는 해당 옵션 존재)
nginx.conf 에서 아래 옵션을 줘 worker process를 하나로 세팅한 뒤 진행하는 것이 디버깅하기 편할 것이다.
1

worker_processes 1;
worker process 에 breakpoint가 잡힌 상태